Mastering Bike Chain Repairs: A Comprehensive Guide for Every Cyclist
How to Fix a Bike Chain: Mastering the Basics
There’s a special kind of frustration that comes from hearing that sudden snap mid-ride — the moment you realize your bike chain just gave out. Whether you’re on a casual loop around the neighborhood or halfway through a long-haul trail, a broken chain can bring everything to a standstill. And let’s be honest, that helpless “now what?” moment hits hard, especially if you’ve never fixed one before.
But here’s the truth: fixing a bike chain isn’t rocket science. With a little patience and the right know-how, it’s one of those skills that feels empowering the moment you nail it — like patching your own flat or brewing a perfect cup of coffee. This guide isn’t just another set of instructions. It’s built to walk you through everything: why chains break, how to spot problems early, and exactly what to do when it happens — even if you’re stranded without tools.
We’ll dive into different chain types (yes, not all chains are created equal), show you how to fix a busted link, and — crucially — how to prevent it from happening again. By the end of this, you won’t just be fixing chains; you’ll be thinking like a bike whisperer.
Ready? Let’s get your ride back on track.
Understanding Your Bike Chain: Anatomy, Types, and What Can Go Wrong
Before we talk wrenches and master links, let’s slow down and really get to know the part of your bike that makes the magic happen — the chain. It’s easy to overlook this loop of metal links when it’s working fine. But when it’s not? Every pedal stroke becomes a reminder of how crucial it is. And here’s the kicker: not all chains — or their issues — are the same
The Anatomy of a Bike Chain
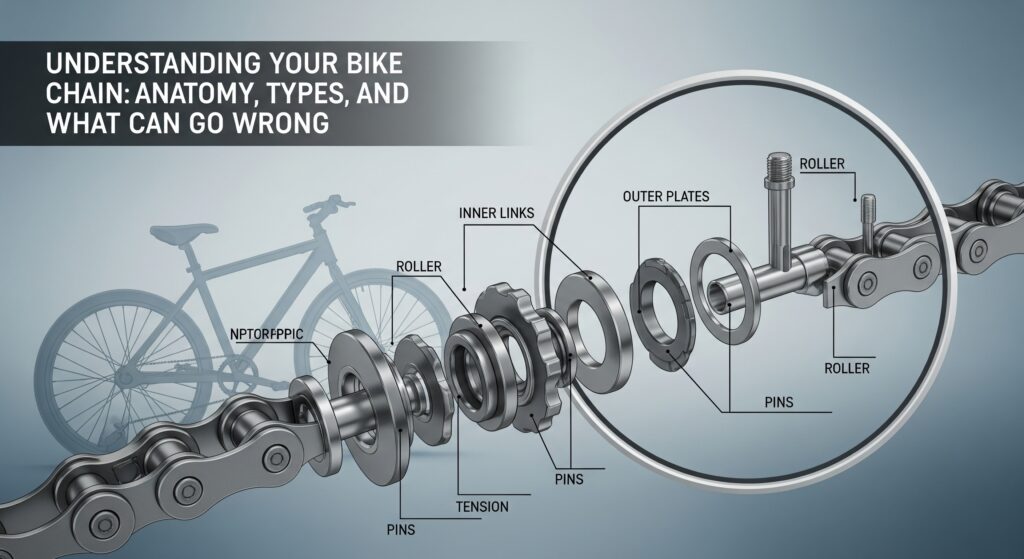
At a glance, a bike chain might look like a simple string of metal. But under the grease and grit, it’s a tightly engineered sequence of:
- Inner links and outer plates: These form the alternating pattern of the chain.
- Rollers: Tiny cylinders that sit between the plates, allowing the chain to rotate smoothly over the sprockets.
- Pins: Hold the links together while allowing flexible movement.
It’s a marvel of tension and motion — and it only works well when everything’s aligned, lubricated, and intact.
Different Chain Types and Their Repair Needs
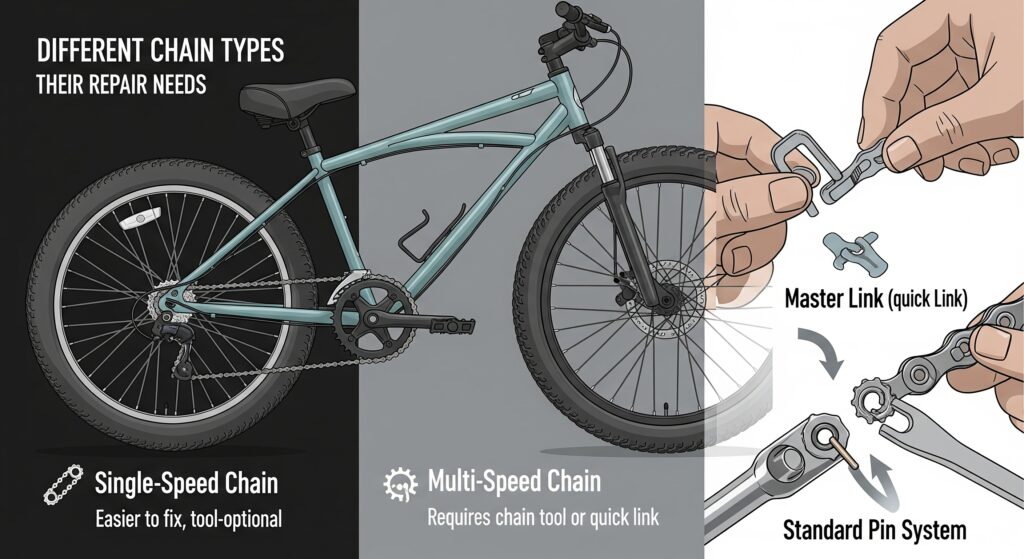
Now, depending on the bike you ride, the chain you have — and how you fix it — might differ. Here’s a breakdown:
- Single-speed chains: These are the thick, sturdy ones you’ll find on BMX bikes or cruisers. They’re more forgiving and easier to reconnect without fancy tools.
- Multi-speed chains: Found on most mountain and road bikes, these are narrower and more delicate. They require precision — and usually a chain tool or master link.
- Master link vs. standard pin systems: Some chains use reusable “quick links” (a blessing for trail-side repairs), while others need a chain pin to be pushed in and out with a tool.
Knowing your chain type helps you anticipate what tools and methods will actually work — and what might leave you stuck on the side of the road.
Why Chains Break in the First Place
Chains don’t just snap out of spite. Common causes include:
- Wear and tear over time — especially if you ride often without cleaning or lubricating.
- Improper shifting, particularly under load, can twist or misalign the chain.
- Poor installation or a weak pin reattachment from a previous fix.
And sometimes? It’s just bad luck — a rock, a root, or a nasty pothole gets the better of you. Either way, understanding the mechanics puts you one step ahead.
What Kind of Chain Do I Have?
FAQ: How do I identify the type of bike chain I have?
Start by checking the number of gears on your rear cassette. Fewer gears usually mean a wider chain (e.g., 1-speed = wider chain). Look for a model number or brand stamp on the chain’s side links. And if in doubt, snap a quick pic and ask your local bike shop — they’ll identify it in seconds.
Essential Tools for Bike Chain Repair: What You Need (and What’s Nice to Have)
Imagine this: your chain snaps mid-ride, and you’re miles from home. No tools, no clue, just frustration and maybe a little panic. Now imagine the same scenario, but your backpack has the right gear. Fixing the chain takes five minutes, tops — and you’re back pedaling like it never happened. That’s the power of preparation.
Let’s break down the tools that every cyclist should have, whether you’re wrenching in your garage or patching up trailside.
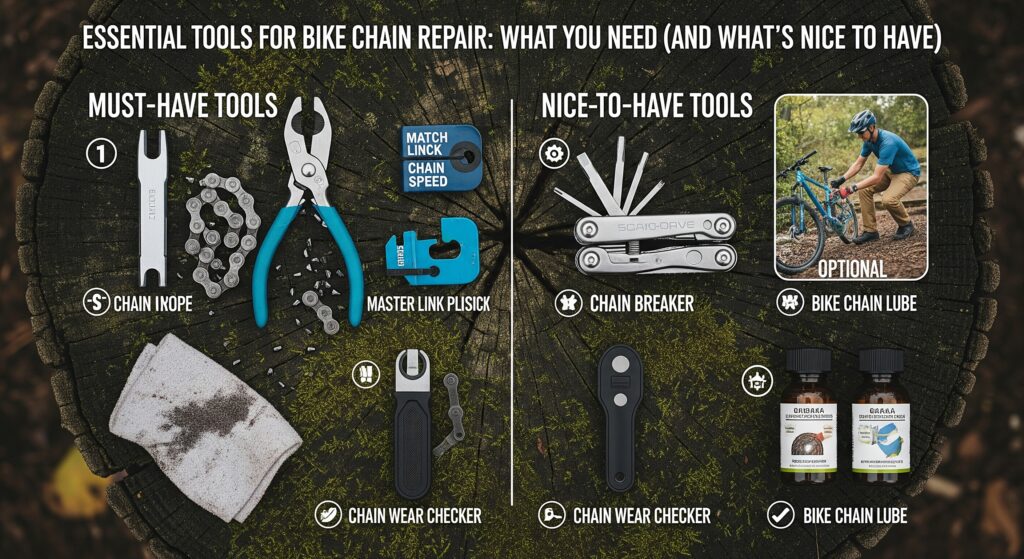
The Must-Haves: Core Repair Tools
These are non-negotiables. Without them, fixing a broken chain is like trying to open a wine bottle without a corkscrew — technically possible, but painful.
- Chain tool (aka chain breaker): Used to push chain pins in and out. It’s the gold standard for splitting and reconnecting chains, especially non-master link types.
- Master link pliers: If your chain uses quick links, these make removal and reinstallation a breeze — though you can muscle it with your hands (and some frustration).
- Spare master link or quick link: These small, inexpensive parts are lifesavers. Carry one that matches your chain’s speed (e.g., 9-speed, 11-speed).
- Gloves or a rag: Because greasy hands are the universal badge of bike maintenance… and they get everywhere.
The Nice-to-Haves: Pro-Level Convenience
While you can survive without these, they make the job smoother, cleaner, and faster:
- Compact multi-tool: Many come with a built-in chain tool. Ideal for on-the-go riders who want minimal weight.
- Chain checker: Measures wear and tells you when to replace the chain before it breaks.
- Degreaser and lube: Because a clean chain is a healthy chain — and a smoother ride.
Urban Folding Bikes for Commuters
If you’re packing light but still want peace of mind, go for a mini multi-tool with an integrated chain breaker and a spare quick link in your saddle bag. Add a pair of nitrile gloves, and you’ve got a mobile pit crew in your pocket.
Can I Fix a Chain Without a Chain Tool?
FAQ: Is it possible to repair a bike chain without a chain tool?
It’s tricky but not impossible. If your chain uses a master link and hasn’t jammed too tightly, you might be able to separate and reconnect it by hand. Some cyclists use a rock and a nail (don’t ask), but realistically — carry a proper tool. It’s worth the ounce.
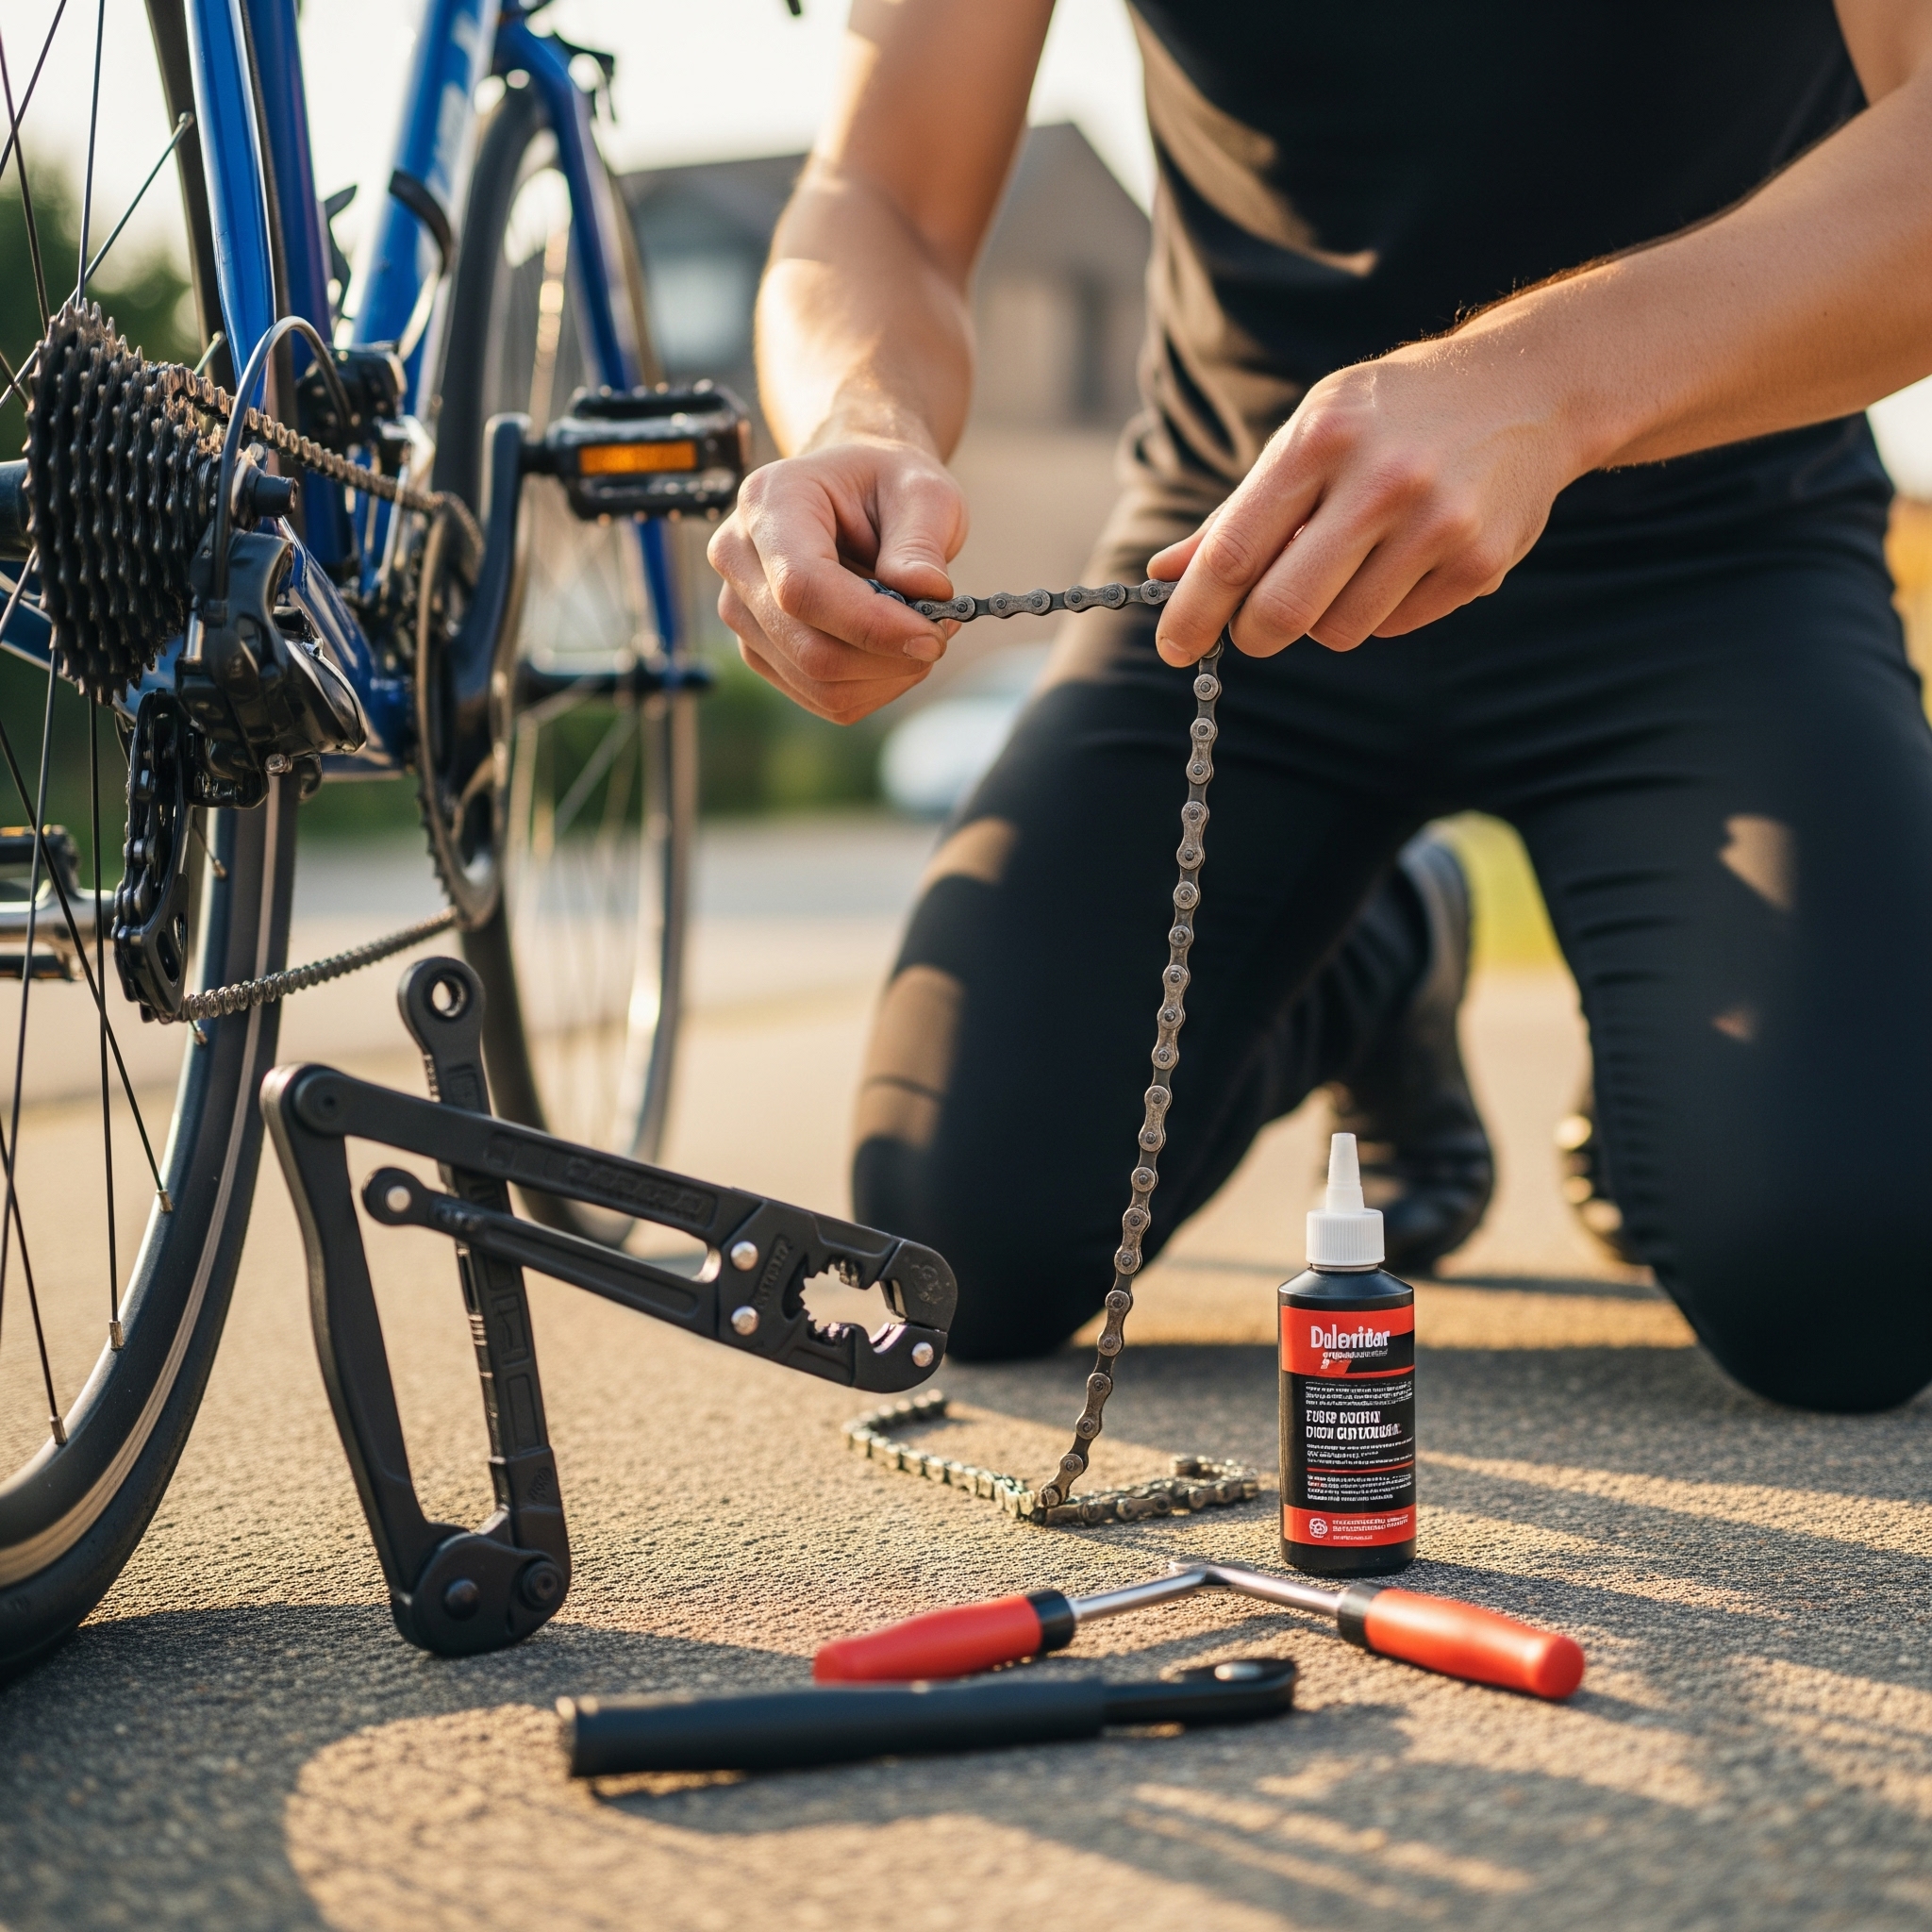
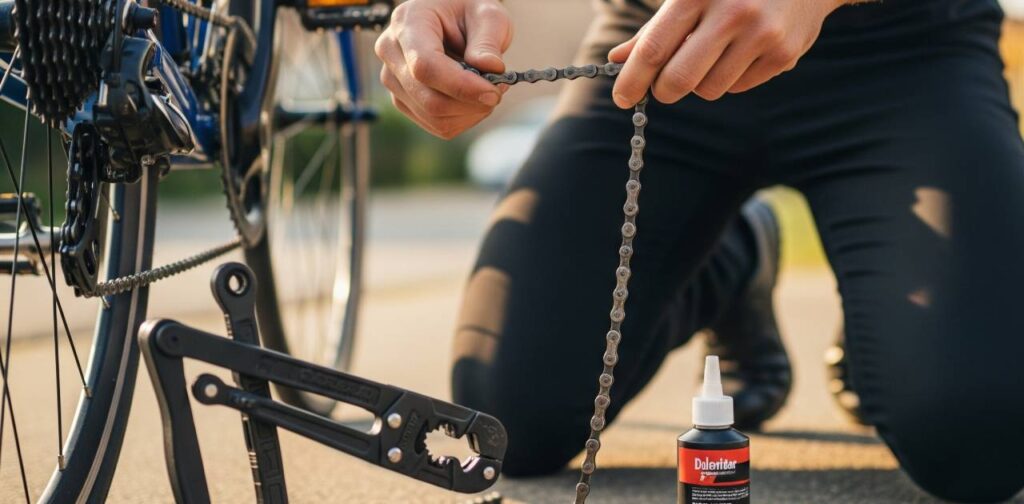
Step-by-Step Guide to Fixing a Broken Bike Chain (Without Freaking Out)
Let’s be honest: the first time you fix a chain, it feels like you’re performing surgery. Tiny parts, stubborn links, greasy hands. But once you get the rhythm, it’s surprisingly satisfying — like solving a mechanical puzzle. So here’s your no-fluff, stress-reducing breakdown of how to fix a broken bike chain, whether you’re in your garage or caught out in the wild.
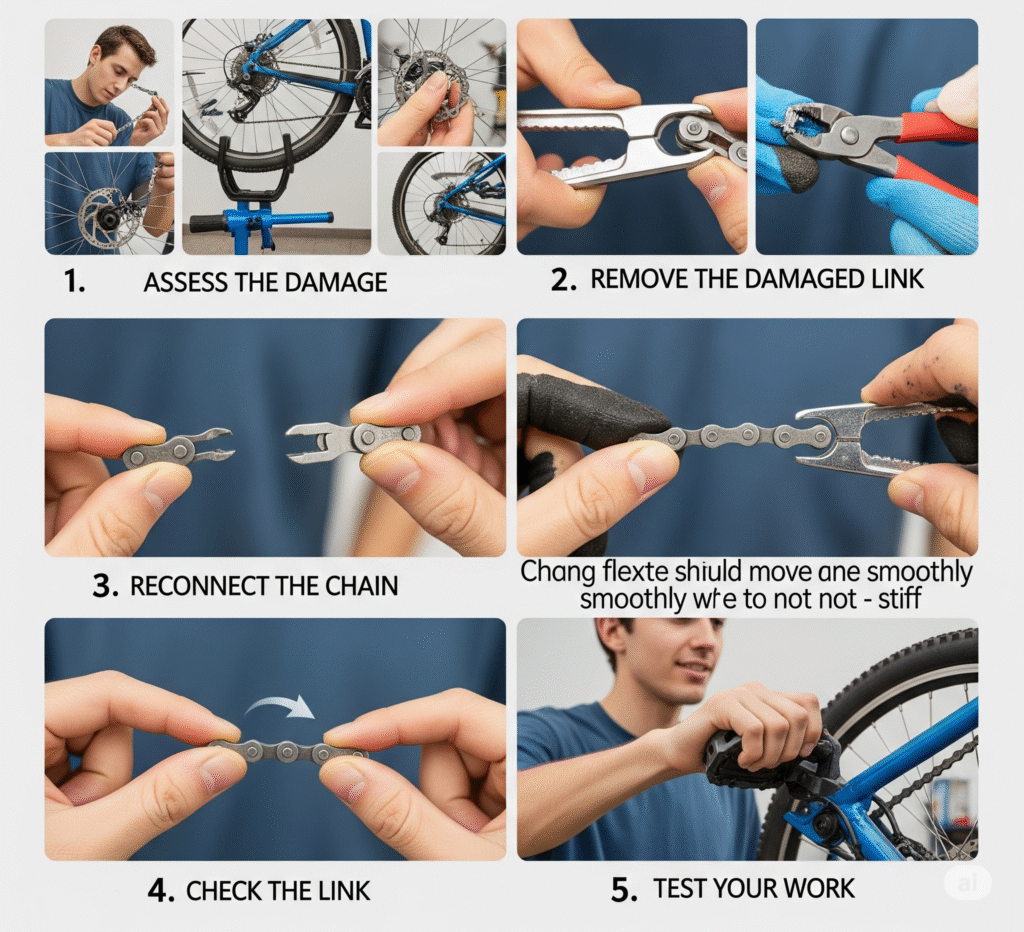
Step 1: Assess the Damage
First, breathe. Flip your bike upside-down or prop it on a stand. Check if the chain is:
Snapped completely?
Just slipped off the gears?
Jammed or stuck?
A full break means repair. A slip might just need re-threading.
Step 2: Remove the Damaged Link
If the chain is broken or a link looks bent or twisted, that section’s gotta go.
Use your chain tool to push the pin out of one side of the damaged link.
Don’t push the pin all the way through — just enough to separate it.
If your chain has a master link, you might not need this step — just pop it apart using your hands or pliers.
Step 3: Reconnect the Chain
Now you’re working with two clean ends. Reconnect them using:
A master link: Slide each half of the quick link onto the ends and snap them together (sometimes a strong pedal backward helps lock it).
A chain pin: If you’re not using a quick link, use the chain tool to reinsert a new pin and connect the chain. This requires precision — the pin should be flush but not stiff.
Step 4: Check the Link
Here’s where a lot of first-timers mess up: the reconnected link is too tight.
Flex the link side-to-side. It should bend and rotate like the others.
If it’s stiff, gently wiggle it side-to-side until it loosens up — or use your chain tool’s loosening slot.
Step 5: Test Your Work
Rotate the pedals slowly and shift through a few gears. Listen and feel:
Is the chain running smoothly?
Any skipping, popping, or misalignment?
No weird noises? You’re golden.
Should I Replace the Whole Chain?
FAQ: If my chain breaks once, does that mean I need a new one?
Not necessarily. If it was just a bad link or a freak event, repairing is fine. But if your chain is showing rust, excessive stretch, or frequent issues, a full replacement is smarter (and cheaper long-term).
Preventive Bike Chain Maintenance: How to Keep Breaks from Happening Again
You’ve fixed your chain. That moment of panic is behind you. But here’s a real win: making sure it doesn’t happen again anytime soon. The truth is, most chain failures are preventable. And the riders who seem like they “never have bike trouble”? They’re not lucky — they’re just consistent.
This section is about setting you up with habits that’ll save you time, money, and surprise walk-homes in the future.
Keep It Clean, Keep It Rolling
A clean chain isn’t just about aesthetics — it’s performance, longevity, and reliability.
Wipe it down regularly: After a few rides, especially if you’ve hit mud or rain, run a rag along the chain to remove grime.
Use a proper degreaser: Not dish soap. Get a bike-specific degreaser and brush to deep clean the links every couple of weeks.
Dry it fully before applying lube — water and oil make a paste that wears your drivetrain faster.
Lube Smarter, Not Harder
Lubing a dirty chain is like putting cologne on without showering. It doesn’t fix the core problem.
Dry lube: Great for dusty conditions — goes on light, doesn’t attract gunk.
Wet lube: Perfect for wet, gritty rides — sticks better but needs more cleaning later.
How often? Every 100-150 miles, or any time the chain squeaks. Sound is your clue.
Pro tip: Always wipe off the excess. Over-lubing is just as bad as not lubing.
Check Chain Wear Before It Wears You Down
Chains stretch — not like rubber bands, but slowly, subtly. That stretch wrecks your cassette and chainrings if left unchecked.
Use a chain wear indicator tool every month.
Replace the chain before it hits 0.75% elongation if you ride frequently.
New chains are cheap. Replacing a full drivetrain? Not so much.
Ride Habits Matter
The way you ride affects your chain’s health:
Avoid shifting under heavy load (especially uphill).
Don’t cross-chain (small gear up front, small in back — or vice versa).
Listen to your drivetrain — weird sounds are warning signs.
How Often Should I Replace My Chain?
FAQ: How long does a typical bike chain last?
For regular riders, expect 1,500 to 2,500 miles. Mountain bikers and commuters might get less due to tougher conditions. The more you clean and lube, the longer it lasts. Simple as that.
Wrapping Up: Fixing a Bike Chain Isn’t Just a Skill — It’s Freedom
If you’ve made it this far, you’re not just someone who rides a bike — you’re someone who owns their ride. That moment when your chain breaks mid-ride? It doesn’t have to derail your whole day anymore. Because now, you’ve got the tools, the knowledge, and the confidence to fix it fast and keep moving.
Sure, your first chain repair might be clumsy. You might curse at a stiff link or get more grease on your hands than the chain. That’s normal. But every time you fix it yourself — instead of waiting for someone else or walking it home — you’re building real self-reliance. And that sticks with you, mile after mile.
So, next time you hear that dreaded snap, don’t panic. You’ve got this. Just remember: a working chain isn’t just about spinning wheels — it’s about momentum, resilience, and the quiet satisfaction of solving something with your own two hands.
Ride on.